Agricultural Tractor Equipped with Michelin Axiobib 2 tires Working in a Field
TRacteur équipé de pneus MICHELIN AXIOBIB2 dans un champ
How to Mount and Dismount Agricultural Tires
Learn essential safety precautions for mounting, dismounting and inflating agricultural tires
Mounting and dismounting agricultural tires must be performed by trained professionals using proper equipment. If multiple people are involved, at least one person must continuously monitor the process.
Use a compressed air system equipped with a correctly adjusted pressure relief valve. Failure to follow these instructions may result in an incorrectly mounted tire or rapid air loss, potentially causing serious injury or death.
Removing an Agricultural Tire from the Rim
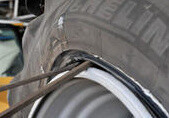
Agricultural Tire Removal from Rim
disassemble a wheel
Before removing an agricultural tire from its rim, make sure the tire is completely deflated. Never attempt to remove the beads of an inflated tire.
Tire Removal Safety Precautions
-
Remove the valve core to ensure the tire is completely deflated before dismounting.
-
Use tools that will not damage the tire sidewalls or beads.
-
Remove the tire beads using the rim's removal notches, if equipped.
-
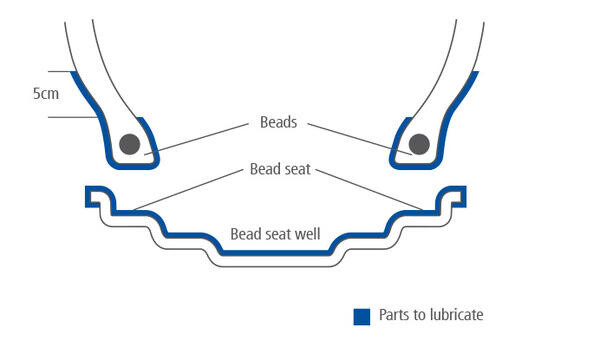
Lubricate the rim seat and tire beads to facilitate removal and help prevent bead damage, especially during puncture repairs.
-
If the rim is visibly damaged, ensure the tire is completely deflated before attempting removal.
Preparing Agricultural Tires for Installation
Before Mounting an Agricultural Tire
Before installation, verify that the tire, rim and inner tube (if applicable) are compatible. Inspect all components and prepare the appropriate mounting equipment.
Agricultural Tire Installation Preparation
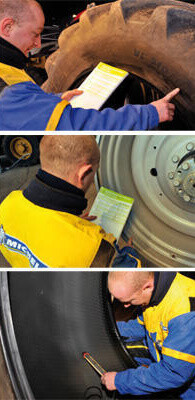
triptich picture of a man removing a tyre
1. Verify Tire and Rim Compatibility
Before mounting, confirm that:
-
The rim meets the required load and pressure specifications.
-
The tire is suitable for the vehicle or agricultural equipment.
-
The rim's seat diameter matches the tire's specified diameter.
-
The tire is approved for mounting on the selected rim.
Important: Never mount a 15-inch tire on a 15.3-inch rim or a 16-inch tire on a 16.1-inch or 16.5-inch rim.
2. Inspect and Prepare the Rim
If the rim has previously been used, inspect it for damage and clean it with a wire brush.
Never mount a tire on a cracked, bent or damaged rim, or one showing signs of breakage or previous welding repairs.
3. Inspect the Tire
For previously used tires, carefully inspect both the interior and exterior for damage before installation.
If damage or excessive wear is identified, have a tire specialist determine whether the tire can be safely mounted. Do not install a tire deemed unrepairable.
4. Check the Inner Tube and Valve
When mounting a tire with an inner tube, always use a new tube that is compatible with the tire size. Never install a damaged or repaired inner tube.
For tubeless tires mounted on tubeless rims, install a new tubeless valve each time the tire is mounted.
5. Prepare Mounting Tools and Lubricate Components
Use clean, properly maintained tools suitable for the tire and rim.
For large or high-volume tires, mechanical assistance may be necessary when mounting the second bead.
Before mounting:
-
Apply a thin layer of appropriate mounting lubricant to the rim seats and tire beads.
-
Apply lubricant to the areas indicated by the manufacturer.
-
Use only products specifically designed for tire mounting.
Avoid petroleum-based products, silicone and antifreeze.
Mounting an Agricultural Tire on an Upright Wheel
Mounting an agricultural tire requires proper positioning, suitable tools and careful bead placement. Follow the correct mounting sequence and verify that the tire is properly centered before completing inflation.
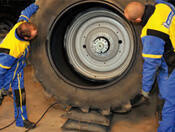
Agricultural Tire Mounting on an Upright Wheel
two men fitting a tire
Tire Bead and Rim Lubrication Diagram
schema or installation diagram
Important: During this initial bead-seating procedure, do not exceed 25 psi. Follow the applicable Michelin mounting and inflation instructions before proceeding.
1. Position the Valve
Position the valve or valve hole at the bottom of the wheel. To help prevent bead damage, position the calibration window away from the valve location.
2. Position the Tire
Fit the tire onto the rim so the first bead rests against the rim flange.
If the tire has a directional tread pattern, check the rotation arrow on the sidewall to confirm the correct mounting direction.
3. Mount the First Bead
Using a suitable tire lever, work in increments of approximately 4 to 6 inches.
-
Slide the first bead over the rim flange.
-
Push the bead into the deepest groove of the rim.
4. Mount the Second Bead
Once the first bead is positioned:
-
Gently tighten the valve nut.
-
If using an inner tube, position the slightly inflated tube inside the tire.
-
Work the second bead over the rim flange and into the deepest groove.
-
Finish mounting at the valve.
5. Center the Tire and Check Bead Placement
-
Slightly lower the jack to bring the center of the tire closer to the rim.
-
Remove the valve core.
-
Slowly inflate the tire to assist with bead placement.
-
If using an inner tube, check that the tire beads do not pinch it.
Inflating Agricultural Tires and Positioning the Beads
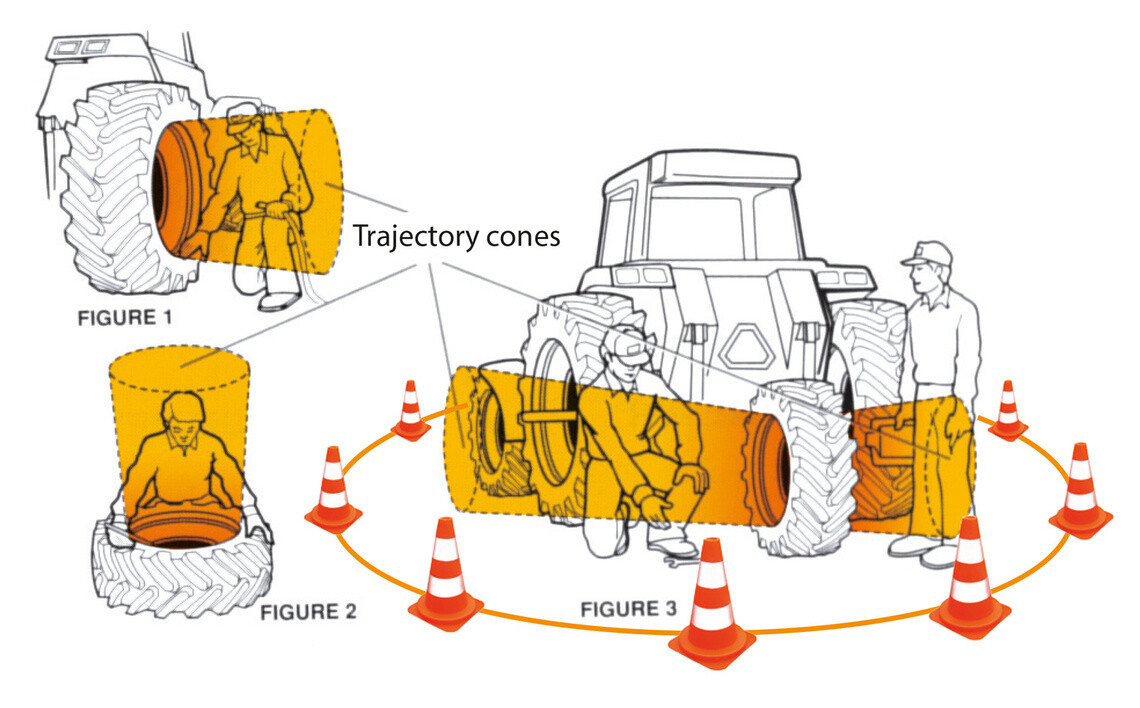
Agricultural Tire Inflation Safety Zones
WARNING: Improper tire inflation can cause serious injury or death. Never stand within the potential trajectories illustrated in the safety diagram. Do not obstruct the inflation gun's handle.
Agricultural tire inflation must be performed by trained personnel using appropriate safety equipment. Before inflation, verify that the tire beads are correctly positioned and centered relative to the rim flanges.
Required Safety Precautions
-
Use an appropriate tire inflation restraint system, such as a safety cage.
-
Wear protective goggles, safety shoes and appropriate hearing protection.
-
Use an inflation gun with a calibrated pressure gauge, a clip-on valve connection and an extension hose at least 10 feet long.
-
Never stand in a tire's potential explosion trajectory.
-
Keep a safe distance from the tire and rim during inflation.
Bead Positioning Precautions
Before proceeding, verify that the tire beads are correctly seated and centered relative to the rim flanges.
Follow the applicable Michelin tire mounting instructions for bead-seating pressure. If the beads are not correctly positioned, fully deflate the tire, lubricate the beads again and repeat the approved procedure.
Completing the Inflation Process
Once the tire beads are correctly positioned, complete the inflation process:
-
Reinstall the valve core.
-
Tighten the valve nut by hand.
-
Inflate the tire to the appropriate operating pressure specified in the manufacturer's load and inflation documentation, or to the applicable storage pressure.
-
Replace the valve cap after inflation or any pressure check to help keep the valve clean and properly sealed.
Additional Precautions for Horizontal Mounting
When mounting a tire with the wheel positioned horizontally, the lower bead can be difficult to inspect.
Follow these additional precautions:
-
During initial inflation, do not exceed 8 psi.
-
Raise the tire and rim assembly into an appropriate safety restraint system.
-
Follow the approved vertical inflation procedure and verify that both beads are correctly positioned before completing inflation.
Returning Agricultural Tires to Service
Before transporting agricultural equipment by road, rail or ship, follow the manufacturer's recommended tire pressure requirements for transportation.
Michelin's existing guidance recommends inflating agricultural tires to 26 psi to help prevent damage from transport straps.
Before returning equipment to service:
-
Check each tire for visible damage.
-
Adjust tire inflation pressure according to the manufacturer's load and inflation recommendations.
-
Verify that the selected pressure is appropriate for the equipment's load and operating conditions.
Important: Transportation pressure should not automatically be used as operating pressure. Always adjust tire pressure to the appropriate level before returning agricultural equipment to service.
Explore More Agriculture Tire Resources
Learn more about agriculture tire care, maintenance and performance with these Michelin resources:
- Reading and understanding tire markings
- How and why to ballast your tires for optimal use
- Find the right rim, tube, and valve fitments
Explore More Agriculture Solutions
Find more Michelin resources, guidance and tire solutions for farm operations.